
Change fonts in Microsoft Excel
Say goodbye to struggling with finicky font pickers. With Font Switch you can change fonts in Microsoft Excel directly from Typeface.
Selection
Select the cells you want to change. Then drag a font from Typeface to your spreadsheet.Requirements
macOS 10.12+Microsoft Excel 2019+
⚠️ Excel 2021+ needs to be relaunched to access newly activated fonts. Therefore Font Switch only works for fonts that are already activated.
Activation
Typeface makes the targeted font automatically available to Microsoft Excel. The font will be temporarily activated, which means that it will be deactivated when you close Typeface (depending on your current settings). This allows you to freely try and switch fonts and you don't have to worry about cleaning up later.
If you want to keep the font persistently activated, you can click on the activation indicator to deactivate the font. Then click it once more to persistently activate the font.
Example: Switching fonts in Sketch
Initial setup
Drag and drop a font from Typeface to Microsoft Excel
When you drag a font to Microsoft Excel Typeface will check if it has the necessary permission to switch fonts. The following steps guide you through setting these permissions. If you've already given permission the font of the currently selected text in Microsoft Excel will be changed right away.
Allow Typeface to control other apps
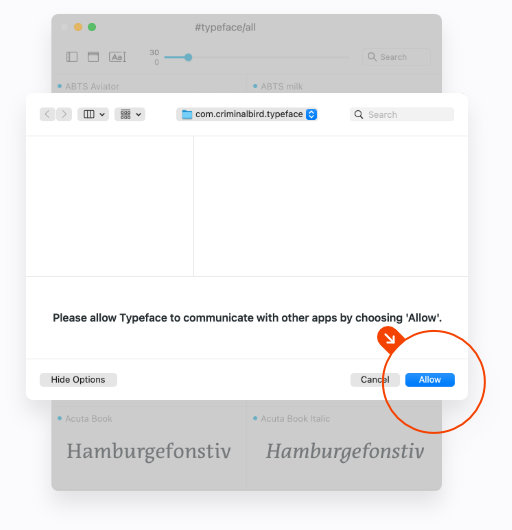
The first time you're using Typeface to switch fonts a file access dialog may show up, which asks for permission to communicate with other apps. The correct folder is already preselected, choose Allow to give Typeface access. This has to be done only once. If you have previously given Typeface access you don't have to give access again and the dialog will not show up.

Allow Typeface to change fonts in Microsoft Excel
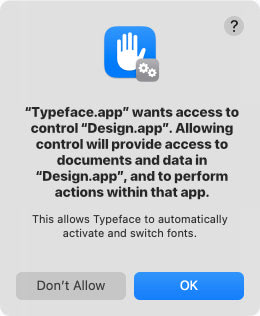
Security restrictions in macOS prevent communication between apps by default. A dialog to request permission will automatically show up. Choose OK to give Typeface access. This has to be done once for every app you want to switch fonts in. After giving permission the dialog will not show up anymore for Microsoft Excel and Typeface will continue to be able to switch fonts.

All set!
After following these steps you're ready to switch fonts in Microsoft Excel. You can freely drag fonts to your documents and Typeface takes care of activation and changing the selected font.
Restoring permissions
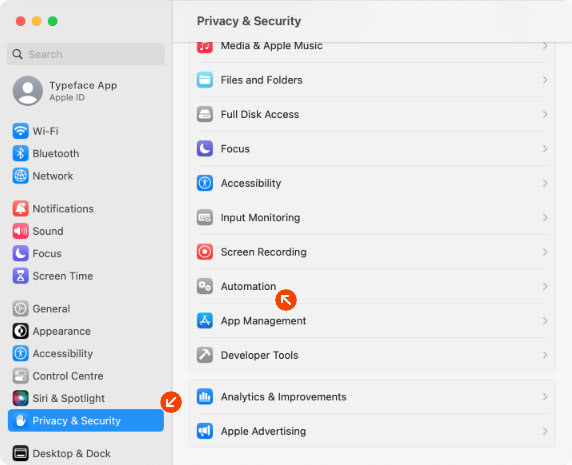
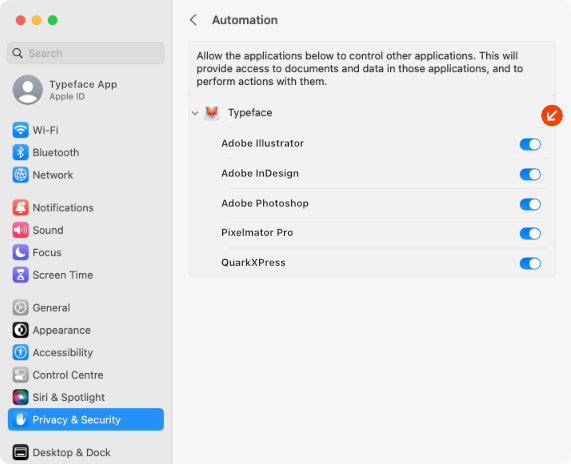
If you aren't able to switch fonts make sure the macOS automation permissions for Typeface are enabled. To see if Typeface is allowed to change fonts in Microsoft Excel follow these steps:
- Open
- Choose
- Choose from the list on the right
- Enable the Microsoft Excel checkbox underneath
If the checkbox is not available just drag and drop a font to Microsoft Excel. The automation permission request should pop up automatically.

