Font Activation
Activate fonts to use them in your apps. Keep fonts deactivated to reduce system resources.
Activated and deactivated fonts
Before you start using and managing your fonts it’s useful to know the difference between activated and deactivated fonts.
Activated fonts are fonts that can be used in your design applications, text editors and other apps. These fonts are the ones that will be visible in the familiar font choosers in Pages, Sketch, Affinity Designer, etc. Deactivated fonts on the other hand are turned off and are not available in these font lists. That is, until you activate them using Typeface :)
You can view both your activated and deactivated fonts in Typeface. And Typeface allows you to activate or deactivate your fonts whenever you want.
Saving system resources
“Why not activate all my fonts?”, I hear you ask. Good question! The first reason why you probably don’t want to do that is because it will increase the size of the font lists in your design apps. That means it becomes harder to find the font you want to use and you’ll have to scroll considerably more. Might become a small nuisance.
The second — and perhaps most important — reason is that each activated font will use some of your system resources. Not only will font lists be a bit longer, it takes some time for your design apps to load and preview all these fonts. The more activated fonts you have, the longer that takes.
How many activated fonts is too many? That depends entirely on your Mac. There is not really a hard limit to the number of fonts you can activate. Each one may make your Mac slightly slower (some complex fonts more than others), but you should not worry about it too much. Activating hundreds of fonts is typically fine. Once you start having thousands of activated fonts you may want to clean things up, because that is most likely not a good idea.
Keep in mind that your Mac already comes with around 700 activated system fonts. Apple knows their systems and their users; Macs can handle this. You should be able to double that and your Mac should run fine. New Macs are also getting faster and faster and have more available RAM, so having lots of fonts will be less of an issue.
That said, it’s nice to clean up your font lists a bit. And you can start using Typeface to manage your activated and deactivated fonts before it grows out of control. I’d recommend to keep your work-horse-fonts activated, there is no reason to keep (de)activating fonts you use daily. You can deactivate the fonts you use occasionally for certain projects and only activate them when you need them.
Typeface allows you to preview all your deactivated fonts, so you can determine which fonts you want to try out before activating them and using them in your design documents.
How to activate and deactivate your fonts
To activate a font click on the activation indicator next to a font name. A blue indicator marks activated fonts. Deactivated fonts will show a grey indicator. When you activate a font in Typeface it will be available immediately in all your apps.

Deactivated / Partially activated (family) / Persistently activated / Temporarily activated
Clicking the activation indicator is a quick way to toggle a single font (or font family). There are several alternative options in Typeface that allow you to activate one or multiple fonts. Try them out to see which you prefer.
1. Drag and drop
Drag and drop a font onto the Activated tag in the sidebar. Typeface immediately activates the dropped font. If you select a few fonts first you can drag them to activate them all at once. To deactivate fonts hold down the Option key when dropping on the Activated tag. You’ll notice the icon next to the Activated tag will switch to a - when you hold down the Option key, to indicate that you will deactivate the dragged fonts.
2. Right click
The right click context menu also provides an option to activate or deactivate fonts. The option will be available if (some of) the targeted fonts are deactivated. Likewise, the option will be visible if (some of) the targeted fonts are activated.
3. Keyboard shortcut
Using the menu you can quickly activate your currently selected fonts. Choose > or use the keyboard shortcut Command; to activate your selection. Choose > or CommandShift; to deactivate them.
4. Activate tags
Want to activate all fonts in a tag at once? Right click on the tag and choose . All fonts that have that tag attached will be activated, it doesn’t take into account your current search filters.
Temporary Activation
When you activate a font using Typeface it stays activated until you explicitly deactivate it, even after restarting your Mac. This is useful for the fonts you use daily, you don’t want to reactivate those every time.
When you’re exploring fonts for your next design project you may end up activating multiple fonts to test them out. This is typically fine, but if all these fonts stay activated they quickly pile up and clutter your font pickers.
That’s why Typeface allows you to temporarily activate fonts. These fonts are marked by an orange activation indicator and are automatically deactivated when you close the app. Press and hold on the activation indicator to get the option. Alternatively right click on a font, hold down the Option key and choose .
You can also add the Temp Activated tag to the sidebar: right click on the All tag and enable . The tag becomes visible in the sidebar. When you drag and drop fonts on the Temp Activated tag in the sidebar they will be temporarily activated as well.
Prefer temporary activation over persistent activation? You can change the default behavior in > . Once is enabled you can click the activation indicator next to a font name to temporarily activate that font. You also don’t have to hold down the Option key in the context menu. The Option key will reveal the persistent activation option instead.
Temporarily activated fonts are deactivated when the app quits. You can change this behavior by disabling the setting. When disabled the fonts will be deactivated when you logout or restart your Mac. They stay activated after quitting the app.
You can manually deactivate all temporarily activated fonts at any time by choosing > , or use keyboard shortcut CommandShift, (comma). Alternatively right click on the Temp Activated tag in the sidebar and choose
Activating vs. installing fonts
If you’ve previously used Font Book to manage your fonts you’re probably used to ‘installing’ your fonts. When you install a font using Font Book the font file is moved to your User fonts folder: /Users/<username>/Library/Fonts. Any font file located in that directory is automatically activated by macOS. You can confirm that by manually moving or copying a font file to that folder and you’ll notice the font will be visible in all your apps. If you want to deactivate a font you’ll have to manually ‘disable’ it.
Typeface doesn’t copy or move your font files, but directly loads and activates fonts in-place. When you import fonts they will be visible inside the app, but they won’t be activated immediately. Your font files stay in the folder you’ve placed them in on your Mac. When you activate a font Typeface links the font file path to the macOS font registration system. Other apps (e.g. Photoshop) can directly use the font from its original location.
So installing and activating are somewhat similar, in both cases the end result is that you can use the font in your designs. But there are several benefits to the Typeface workflow:
- Your fonts are not duplicated on your Mac, the files are never copied.
- You can freely organise your font files wherever you want in Finder. You’re not restricted to /Users/<username>/Library/Fonts, which also means you can keep your fonts neatly organised with their accompanying licenses or other attached files.
- Fonts are not activated immediately, which saves system resources (each activated font needs a bit of memory). You can decide to activate fonts whenever you want and you can always preview your imported fonts in Typeface even if they are still deactivated.
System fonts & macOS font folders
Your Mac comes with many preinstalled system fonts. Typeface automatically imports all these fonts to get you started. Hold down the Option key and click on the User tag in the sidebar to view your system fonts (or right click on User and choose ). For a list of default fonts installed on your Mac see Fonts included with macOS Big Sur.
If you’d rather want to see your fonts only and don’t want to import system fonts you can disable the Font Book source in > .
The system fonts are located in a special font folder on your Mac. There are several of these special font directories on macOS, each with a different purpose:
- /System/Library/Fonts — macOS system fonts, protected
- /System/Library/Fonts/Supplemental - additional macOS system fonts (before macOS Catalina these fonts were stored in /Library/Fonts)
- /Library/Fonts — computer fonts, visible to all users of your Mac
- /Users/<username>/Library/Fonts — user fonts, only visible to your user account
Font files located in these directories are activated by macOS, which means they’ll be available in all your apps. When you move the font files outside of these directories they’re deactivated immediately.
You can also use Typeface to deactivate these fonts (technically Typeface will ‘disable’ them), except for the ones located in the system fonts folder. Fonts located in the system font directory are protected by macOS and cannot be deactivated. Typeface will automatically notify you when you try to deactivate them.
You should typically leave all fonts in /System/Library/Fonts alone. If you try to remove them you might experience system issues. Since Catalina this folder (and others) is also read-only, which means that you cannot remove or change the font files.
Fonts in your user fonts folder (/Users/<username>/Library/Fonts) are yours. You can move them anywhere you like. Or keep them in there, that’s fine, but that folder might be a little hard to access (Finder hides the Library folder by default). So you may want to create your own font folder somewhere more convenient and put your fonts in there (for example /Users/<username>;/Fonts ). You can import that custom font directory into Typeface to view and manage your fonts. Learn more about importing your fonts in Typeface.
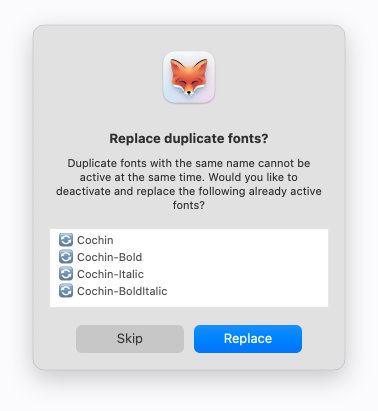
Duplicate font conflicts
Every font has a user friendly display name and a PostScript name. For example ‘Bodoni 72 Book’ has the following PostScript name: ‘BodoniSvtyTwoITCTT-Book’. The PostScript name is often used to identify fonts, but it’s not unique. If you have two versions of the same font, for example an OTF and TTF version, both will most likely have the same PostScript name.
The macOS font registration system (which manages activated fonts) also uses the PostScript name to identify fonts. That means that two fonts that have the same PostScript name cannot be active at the same time, otherwise macOS doesn’t see the difference. This is called a ‘conflict’.
To prevent these conflicts Typeface offers to deactivate the duplicate fonts first, before you can activate the new fonts. For example let’s say you’ve activated the ‘Alegreya-Regular’ TrueType font, but you want to activate the OpenType variant instead. The OpenType font is also called ‘Alegreya-Regular’. If you want to activate the OpenType font Typeface offers to deactivate the currently activated TrueType version first, such that they’re swapped. This makes sure there are never two fonts with the same PostScript name active at once.
Note that Typeface cannot deactivate protected system fonts. That means that it’s not possible to activate your own copy of a system font, as that would create a conflict with the already active macOS system font. For example if you want to activate your own version of ‘HelveticaNeue’, the currently activated ‘HelveticaNeue’ must be deactivated first. But the latter is protected, so Typeface cannot swap them. You’ll be notified if a font cannot be activated due to a protected system font.
Auto activation
If you like a clean system you may want to keep the number of activated fonts to a minimum. However that means that you’d have to activate fonts whenever you open a document that uses one of your deactivated fonts.
Typeface app can help with that and can automatically activate missing fonts when you open a document in another app. This allows you to keep fonts deactivated while Typeface automatically provides fonts when necessary.
Learn more about auto activation